In winter I get up at night
And dress by yellow candle-light.
In summer, quite the other way,
I have to go to bed by day.
— Robert Louis Stevenson, Bed in Summer
This post is part of a series about building a house that looks and feels traditional in New Hampshire. However, this post can be read by itself.
Designing a New Old Home series, Table of Contents
Beginnings — Why an “old” home, and how we came to buy land
Curiosity — Advice on starting
Research, Sketch, Collect — Essential research for home design
Defining Constraints — What can we do without
The Elements — Heating and cooling and airflow
Materials and Hardware — Making choices
Light ← You are here
The Kitchen
…
Designing for Light
Before we go over how to we think about lighting, a short primer on artificial light is warranted, because the options are numerous and the quality varies immensely.
Color Temperature
All light sources can be described in part by their color temperature, which is given in a Kelvin scale from roughly 1,000 to 12,000.
For natural light sources, these numbers really do describe how hot things are. Candles burn at ~1700 degrees Kelvin (~2600° F or ~1400° C), the sun really is a big white hot object at 5772 K.
Despite this, lower numbers are described as “warmer” and higher numbers as “cooler”. In practice you might see differences like this:

Different color temperatures have distinct advantages. Warmer color temperatures are more cozy, but too warm and a place might feel dingey. Cooler color temperatures can show colors better (matching daylight), which can be essential in studios, showrooms, and industry, but too cool and it can make a home feel antiseptic.
There’s a bunch of research about color temperature and mood that is outside the scope of this post, and I encourage you to read about that if you’re interested. I will simply mention that it is broadly thought that warmer color temps at night can improve sleep, and improve night vision — cooler colors blind you more especially if you happen to look into the light source. By contrast, cooler temps and brighter lights during the day (if you need artificial light during the day) can improve mood.
CRI
The color rendering index (CRI) is a 0-100 scale of a light source’s color representation accuracy. Higher is better. Industry and stores were concerned with CRI long before consumers, for example, supermarkets in the 1970’s wanted to be sure their produce looked as good as possible. But since the rise of incandescent alternatives—many of them with poor color quality—consumers have also taken an interest in CRI, and many manufacturers now give a CRI number on the box.
CRI is about 15% fake. The test itself only covers a small set of color samples, so manufacturers can game the number while still emitting a poor spectrum, and on top of this I suspect that some manufacturers simply lie. A single number can also be unhelpful in telling what’s wrong with a bulb (two bulbs with the same score can saturate different colors poorly). Despite this, a CRI 95 bulb will probably look better than a CRI 80 one. But there is no substitute for buying and trying the bulbs.
On occasion you will find a lower CRI bulb that looks great anyway. This is not too surprising — the metric was originally an attempt at being objective about color, but it can fail to test what humans find perceptually pleasing. An intense example are sodium vapor bulbs, which gave many cities their yellow and orange glow for decades, though they are being phased out now. Their light really is yellow in addition to being warm, and they have a CRI of about 25.
Indoors, in general, the brightest bulbs you select should probably have a high CRI. But supplementary dimmer bulbs, such as reading lights, can be perfectly good (or even pleasing) with lower CRI.
Lumens and Watts
Lumens are a measure of light intensity. Watts are a measure of the power draw. A 60-watt incandescent and a 6-watt LED bulb can both give off 750 lumens, with the difference as wasted heat. For a long time consumers were only familiar with wattage, so manufacturers might call the 6-watt LED bulb a “60-watt equivalent” instead of stating its lumen value in the title (it might be elsewhere on the box, and printed on the bulb itself).
Types of Bulbs
Incandescent - If you put a tiny piece of tungsten wire in a glass ball and run electricity through the wire, it will get so hot that it produces light. You are actually heating it to the literal color temperature of 2700K (4400° F or 2427° C). They are hot! Most of the electricity is therefore wasted as heat. Also they are beautiful. This is in effect a miniature dimmed sun, so the CRI is 100. Almost always 2700K. Perfectly dimmable.
Halogen - If you put a tiny amount of a halogen gas inside an incandescent you get a more efficient bulb that can operate at higher temperatures, and in compact spaces. CRI 100. 3000-3500K. Perfectly dimmable.
Both Incandescent and Halogen bulbs become warmer (lower color temperature) as they are dimmed, down to about 2200K.
CFL - Compact fluorescents have a poor CRI (often 70-80) and contain mercury gas and aren’t really used now that we have better LED options. Poorly dimmable with slow start up times. I know of no reason to buy one today.
LED - A basket of technologies for putting power through a semiconductor and getting back light. Extremely efficient and small, with little waste heat, and long life (in theory at least, there are many bad manufacturers). Quality is all over the map. Cheap ones should be avoided. The best inexpensive brands are probably Philips and Feit. CRI usually 80-95, can be found in any color temp, even very warm. Dimming is often poor, and the worst offenders will flicker and buzz when dimmed.
Natural Light Considerations
Part of house orientation is letting in light where it matters. In our case, there were several things to balance with the floorplan:
The house front door should face the road, to look stately
The kitchen windows and any French doors should face the yard, to give the best views
There should be easy access from the kitchen to a patio for dining, and dooryard garden for herbs, etc, and these are ideally on the southern side. (Part 3 covered more about kitchen garden placement.)
Rooms we spend the most time in should be on the southern side, to maximize light.
Windows are always two-way portals: They should not only let in light but one should be able to look out them and see pleasant scenes. This means that cars and driveway should be on the darker north side, along with the less-frequently used rooms.
The basic idea of the floor plan, with our budget only allowing a single 30x38 mass, therefore looks like this:

There would be more interesting decision-making here if we had more than just one mass to work with. Larger houses need to maximize light, but the very good ones also make great use of darker spaces, for things like reading nooks and other small rooms or passages. A result of our budget is that we could not afford the luxury of shadows, privacy, and passages that are enabled by well-executed complex massing.
So with a simple footprint, most of the decisions here are pretty clear and centered around light maximization. You don’t want a bathroom/laundry on the valuable southern wall. You do want the dining room adjacent to the kitchen. And you want the most light in the parts of the house that you are going to use frequently.
One major decision which I’ve mentioned before: There was originally a planned wall between living room and dining room, to give more enclosure to the spaces, making them feel more private and cozy. We’re not very fond of open floor plans. But we removed that wall from the plan to allow a more central wood stove that could heat the whole house. This is, in some sense, another compromise from having only a single mass.
Outside, the result looks like this:

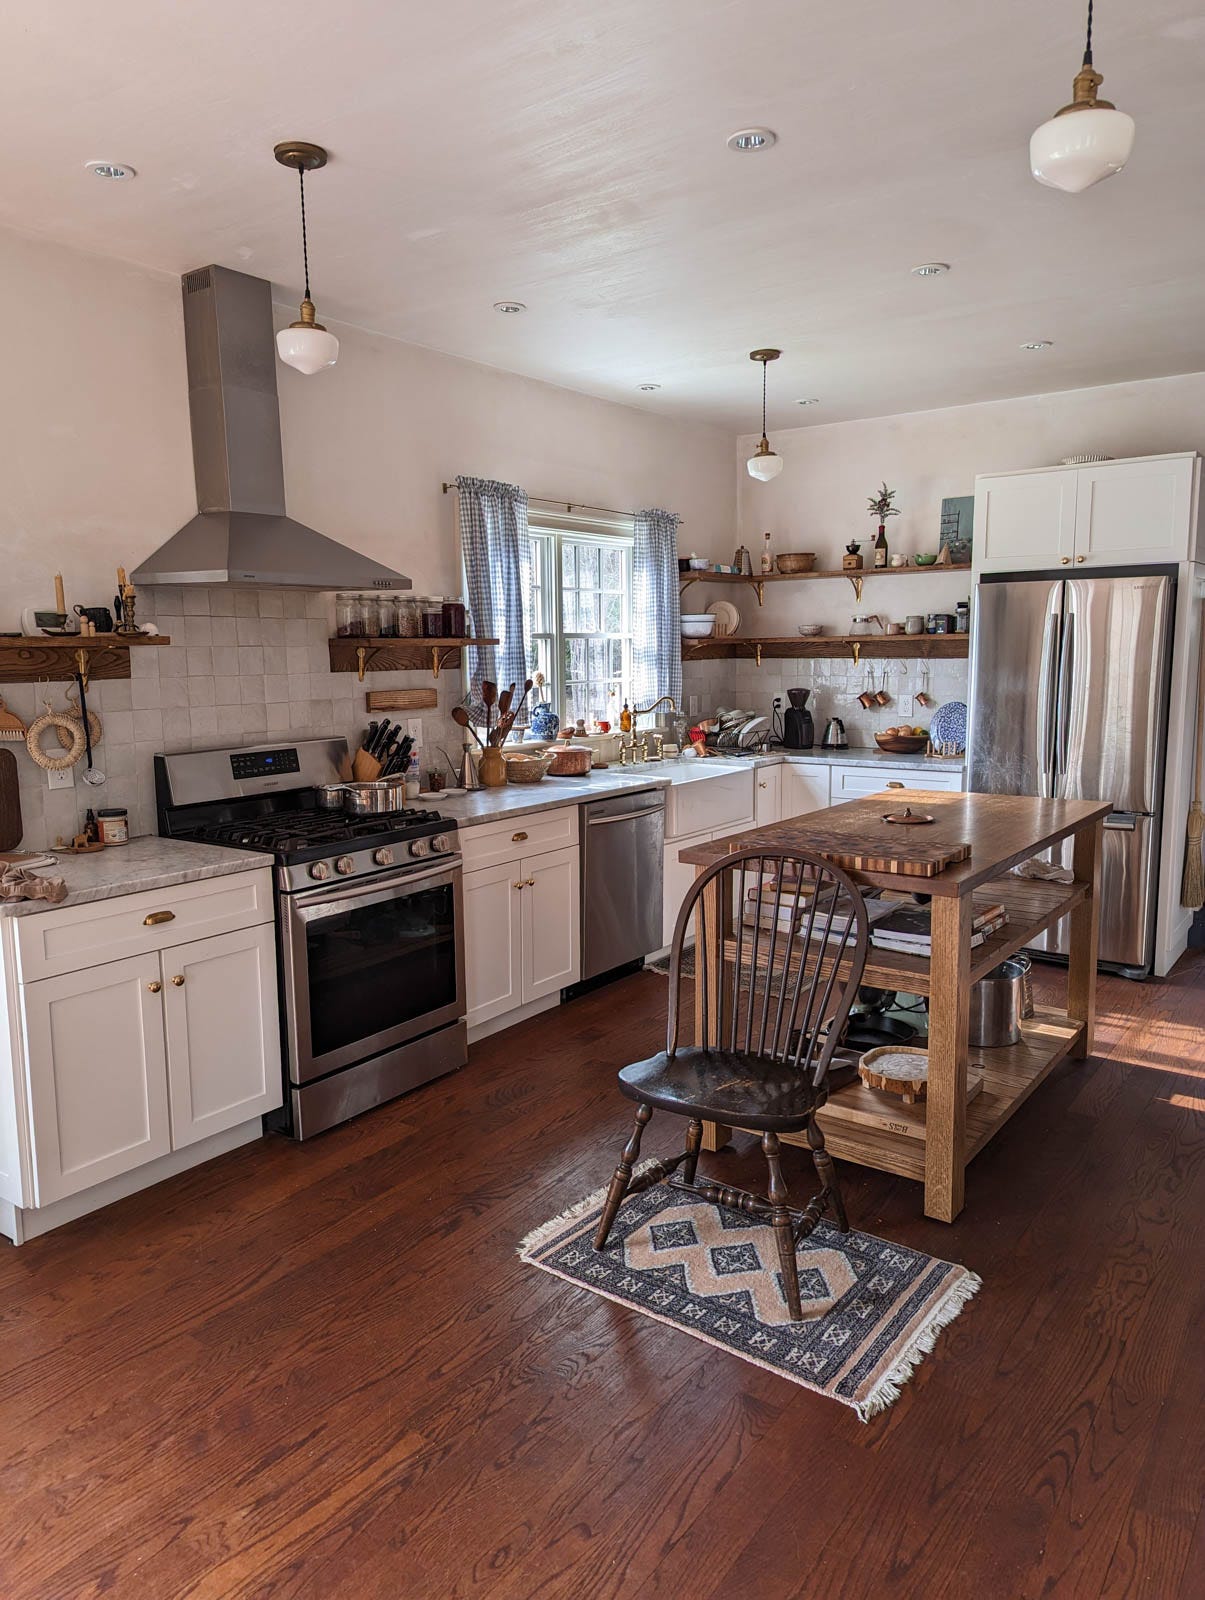
The kitchen could have been on the south wall instead of the west. But the ideal pattern, to me, is that the kitchen receives ample natural light but the softest version of that light possible, for as long as possible. Being open to the southern side, but farther from it, feels ideal. A typical day might produce this light in the afternoon:
It is difficult to reproduce the feel and colors of the sunlit kitchen from photos, since it changes so much throughout the day, and since my phone camera in particular constantly mistakes the color balance indoors. Later in the evening, the kitchen light might look like:
The softer-light allows one to store some light-sensitive ingredients (like a bottle of wine) against the western wall for a day without too much worry. Nonetheless we keep our olive oil in a metal vessel to protect it.
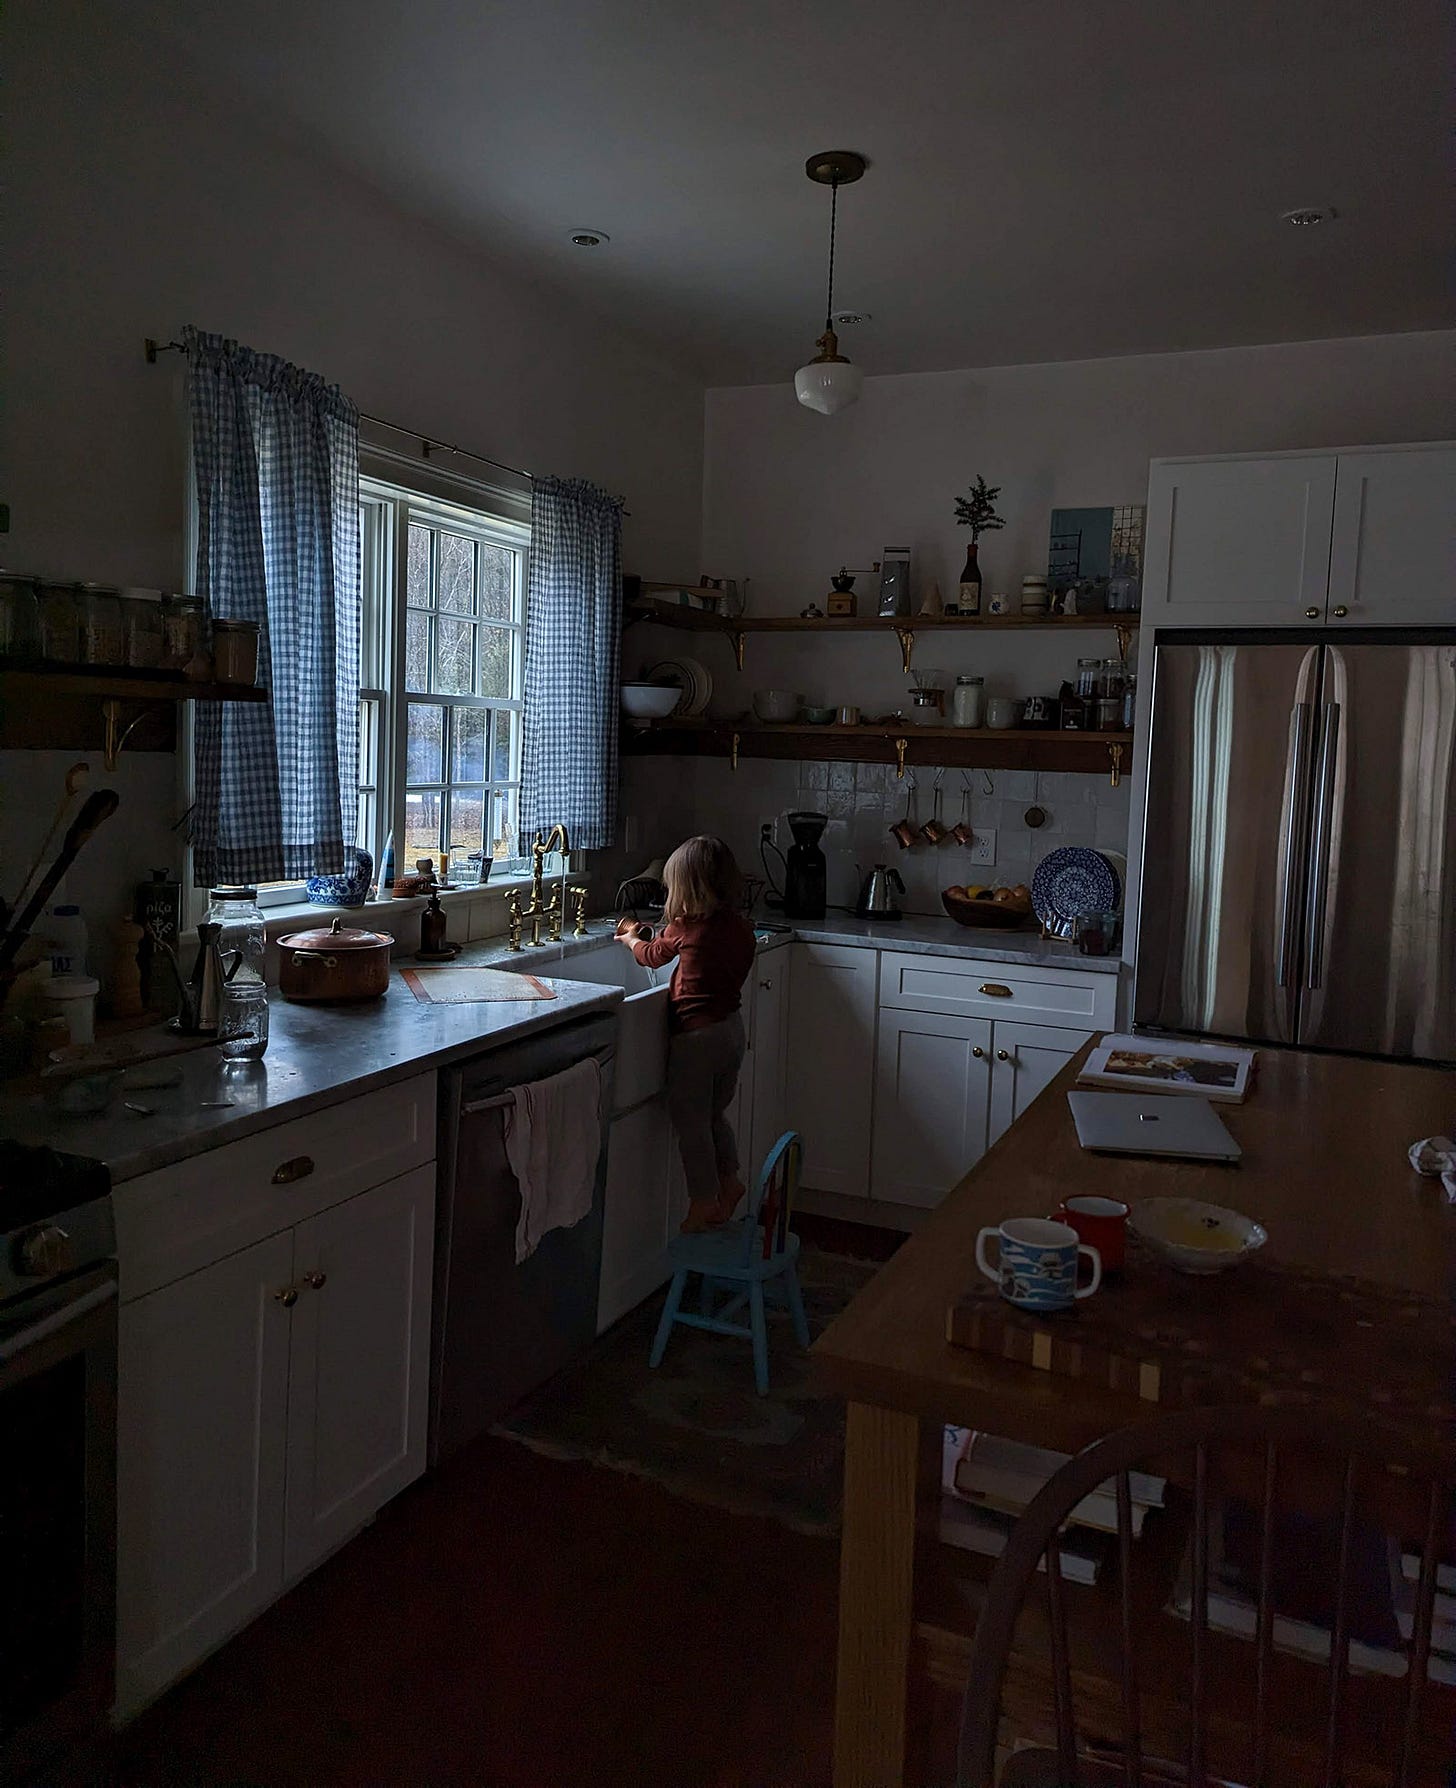
In the evening on a very cloudy day, it might look like this:
The western light affords use of the kitchen as long as possible without electricity. We find this extremely pleasant. We love not only light, but shades and shadows too, and the varied contrast of the hours. So we tend to delay turning on electric lights until they’re really needed.
Natural Light in Bedrooms
Upstairs, there are two bedrooms on the northeast and northwest corners, and the master bedroom (with its bath) takes the whole south. The master bedroom is very bright, with a matching largeness that makes it feel right. This does not make the master bedroom strictly better, however.
All three bedrooms were designed with windows on two walls, and no bedroom has fewer than three windows. The other two bedrooms, especially the western one, have a superior softness to their light quality. This is difficult to show with pictures, it’s something that has to be more lived in.
The same soft light is true of the studio room downstairs. Though I don’t use it to paint, I should mention that in general artists prefer northern-lit rooms for studios, because the lack of harsh rays and relatively unchanging nature of northern light make for more consistent working conditions.
Artificial Light Considerations
The halogen and incandescent bulbs in this house are always at least a little bit dimmed. If there is a single thing you should remember from this section: when you are using halogen or incandescent bulbs, you should dim them, if only a little. This reduces their power draw, but it also greatly increases their life. And naturally it lowers their color temperature.
The kitchen is illuminated by two sets of lights. Halogen recessed lights (“cans”) on the ceiling, which house Philips 3100K 50w bulbs. These halogen cans are the same everywhere on the first floor, and are only on the first floor. I’m not crazy about them, stylistically, but when combined with other light sources they can be pretty useful.
They two sets remain dimmed (between 20% and 80%) in normal use. We would only put them to full power when doing very specific work that needs as much light as possible, or when cleaning at night.
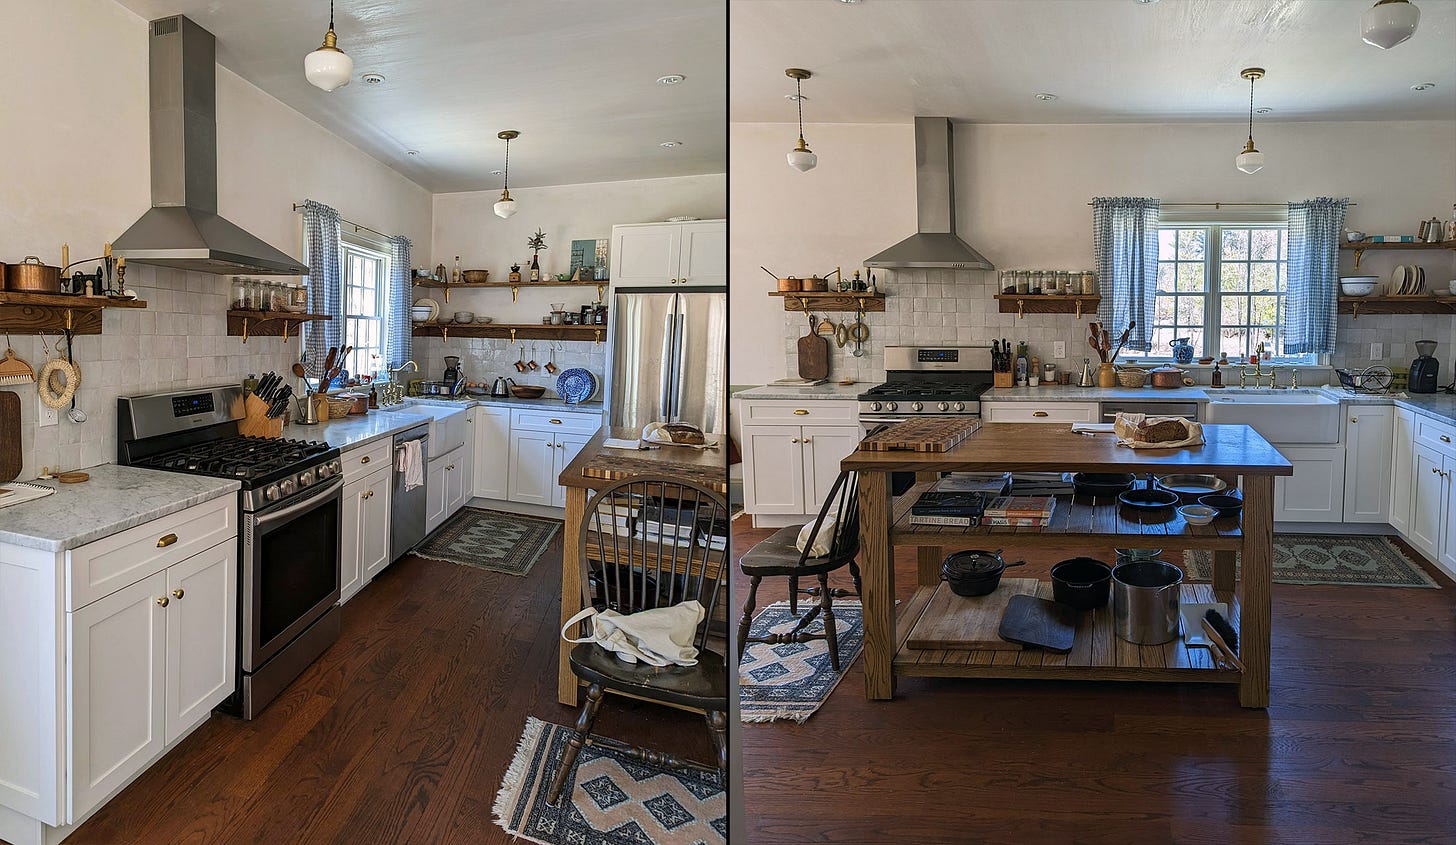
Various dimming, with the pendant lights on or off:
Note how halogen ceiling cans are also directional. They have to point at something, and generally they should point at the walls instead of straight down. In the living room they point between windows, where art might be placed. You can get halogen bulbs with wider or narrower “flood”.
The pendant lights are LED, each has a Philips 700 lumen, 9.5w 2200-2700 K dimmable bulb. These are ugly bulbs, but they are completely hidden, and additionally softened, by the milk-glass of the pendants. The dimming function works well for an LED.
Note the height of my pendants. This next image, in my opinion, is something you want to avoid:
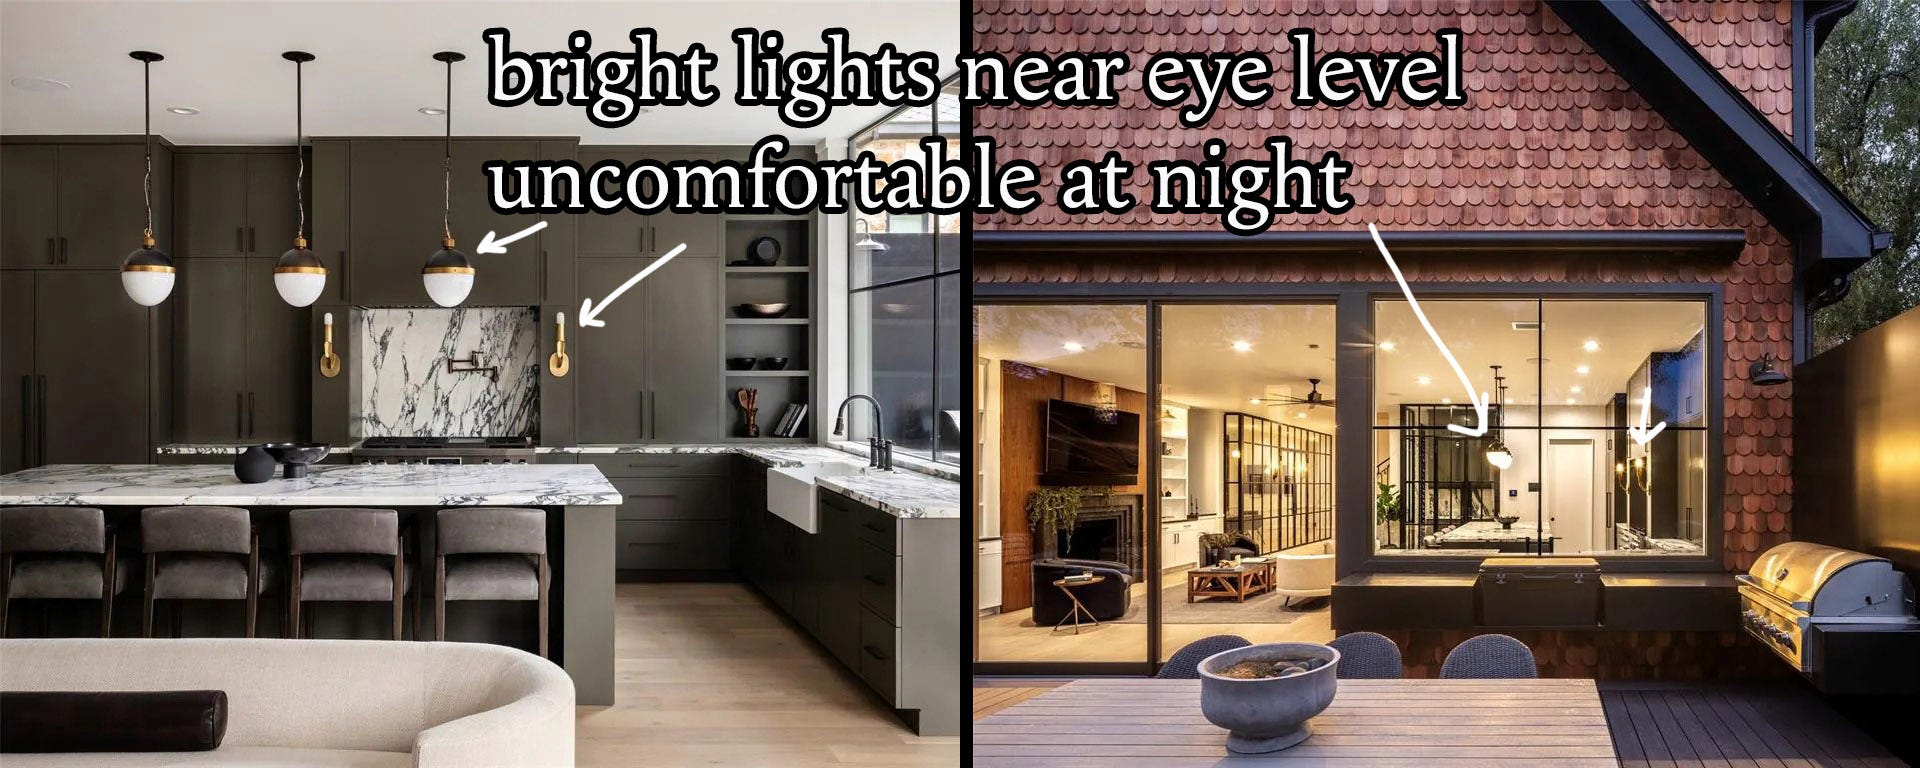
It is irksome to work alongside someone or even just sit at a kitchen bar with a light so close to your face.
Other Rooms
In the living room and dining room we also have halogen cans, but most of the time they are fairly dimmed. The dining room gets additional light from a chandelier of 7.5 watt incandescents. Again: almost never full power, but dimmed! So the total power draw is quite low. LEDs look especially poor in many candelabra settings because the bulbs themselves can be very ugly, and their light very directional. In chandeliers you really want the effect of a glow less than trying to illuminate every corner of the room, so under-powered incandescent bulbs are still the most beautiful choice, here, despite their inefficiency.
As a supplement the living room has a small table lamp (with a 15w incandescent) for working, and a floor lamp for the couch, from IKEA. In general, do not use IKEA LED bulbs. They are almost all universally poor. There’s one exception, their very dim LED bulbs like this one are peculiar enough to be good. The CRI is poor, they’re quite dim and quite yellow, but it’s kind of a beautiful light and the bulbs do not look that bad. They are also safe for children to handle since the bulb is plastic, not glass. They make a decent night light in a child’s room, or in an attic space.
In that floor lamp instead we have an LED Feit “vintage Edison” style 200 lumen, 2100 K bulb. The CRI of this bulb is also somewhat poor, at 80, so it’s fairly yellow. But it makes for a beautiful reading light and does not seem to conflict badly with the light that the halogens give. You have to be careful mixing bulbs generally, sometimes it can make a room look awkward. There are no rules here, though, there’s simply no substitution for trying different bulbs.
Upstairs Lighting
Do you really need bulbs upstairs, dear reader? Do you need electricity at all? Why not simply take a candle? You do? Fine. All right.
I’m of the opinion that lighting upstairs should be dimmer than the first floor. It should have a completely different mood. On the first floor it’s nothing to flick a switch that might kill a cave of bats, illuminating every corner. Sometimes you need to. Upstairs the same setup feels harsh and garish and I think people commit enormous error by treating these floors the same.
I especially do not like overhead lights on the second floor, even more so if the ceiling height is lower (in our house the first floor is 9 feet, the second floor 8.5 feet, to make it slightly more cozy, and less cavernous feeling). Of course if you work or do other projects upstairs you may also need very bright lights for that, but in general you should consider if you can get away with something considerably softer.
Our upstairs is illuminated solely by 5-watt and 7.5-watt incandescents, almost all on dimmers. The glow (and look) is still unmatched by LED bulbs, and we use so little electricity comparatively that the bulb efficiency is of no real importance.
There’s an exception for the bathroom, where you might need to see with perfect clarity. A very warm setup for the bathroom can cause one to misjudge colors. At the same time some kind of night-light is paramount in a bathroom, so it can be nice to have both very bright and very dim options.
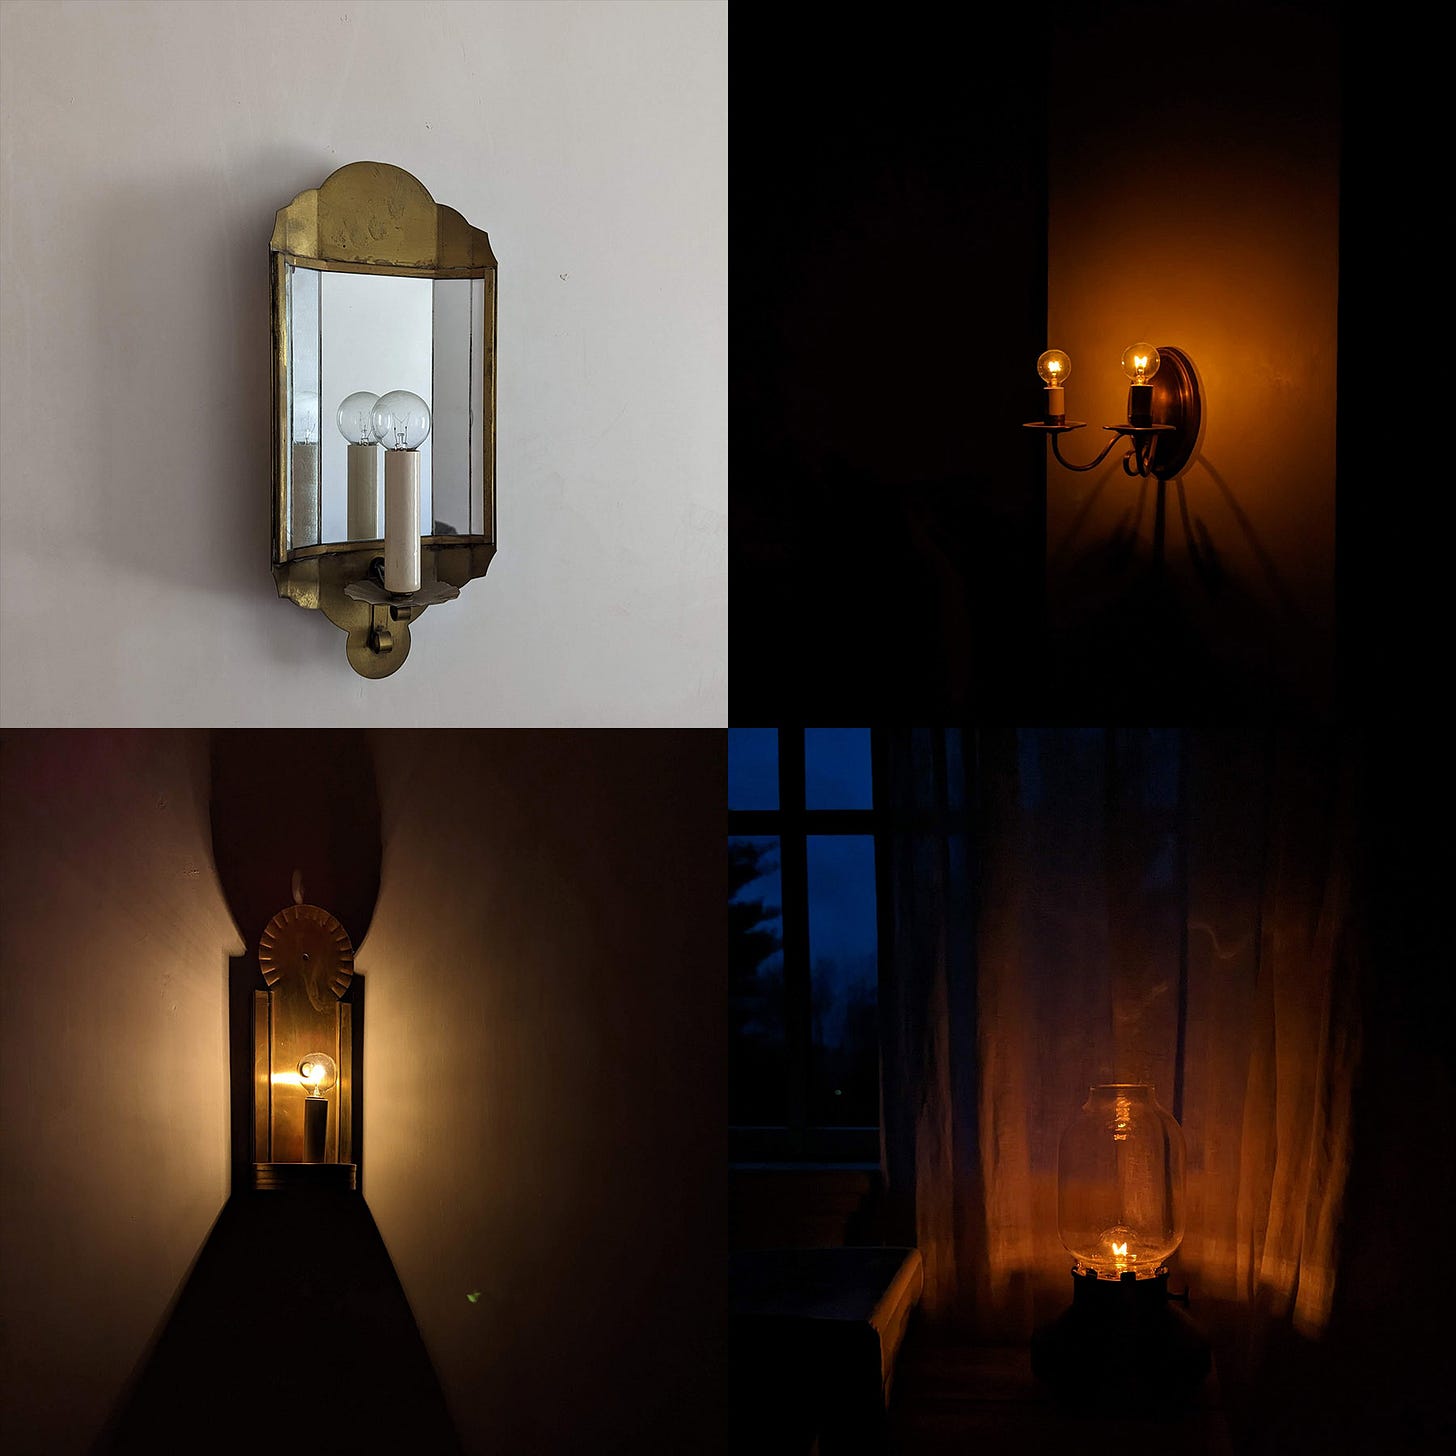
With no overhead lights, we make great use of sconces (all three here are raw brass from Northeast Lantern, a New Hampshire company), and a few table-top lights. The bathrooms have lights above the mirror, and a counter-top 5-watt as a night light.
The bottom-right table-top light is from IKEA, (taernaby). It is one of the best dimmable table-top lights for the price. You should immediately discard the awful LED it comes with and buy a 5-watt incandescent.
I do not expect you to agree wholesale with our philosophy on lighting, but I do encourage you to buy some 5, 7.5, and 15 watt incandescent bulbs and try them out, and see if you like them. Ultimately there’s no substitute for buying and trying bulbs yourselves, and while this can be frustrating with LEDs (many of the excellent ones are very expensive), incandescent bulbs are extremely cheap.
You can actually make your own fixtures
Most light fixtures in our house (and all the exterior ones) are from Northeast Lantern, which makes beautiful brass fixtures, though they are not cheap. In a few rooms we have vintage lights from eBay, with modern bulbs, and in the kitchen the four pendant lights are from Etsy. These last lights were actually assembled out of brass parts, which are freely available to buy from the appropriately named Grand Brass Lamp Part company, should you wish to make your own light fixtures. We did this with one light, though we have since replaced it with one from Northeast Lantern.
Shadows
It is very possible for a house to have too much light, especially a large house. Some people really do go overboard with natural light, for instance with a peculiar nouveau lodge aesthetic. (Though in their particular defense, such walls of windows were likely originally intended for nighttime viewing, not daytime light.)
There is a certain attraction to dim spaces, alcoves, nooks, and so on. Every big house should feel like it has its secrets, and this includes secret spaces. If there is a virtue in size, it is not in the bigness itself but in the ability for separation, including separating oneself from the light, and others. The Victorian-era concept of a drawing room after all is short for withdrawing.
But such a topic is too big this post — it will have to wait for another time.



This is a lot of helpful information. I just wanted to comment that what you refer to as "waste heat" from incandescents, we use intentionally (in the winter; we live in Montana) to bring localized warmth to certain areas. My favorite use of this localized warmth is in the dining room. We switch to LEDs in the dining room for the summer, although we don't use the lights in that room too often in the summer, but in the winter, we switch back to incandescent bulbs in the overhead light, which casts soft light and a little pool of extra warmth onto us as we sit at the table eating and playing board games. I'm grateful we don't have to have to the extra heat in the summer, but in the winter, it's a blessing.
This is a fantastic treasure trove of lighting knowledge - thank you!